Contents
- 01Before You Start: Safety and What You'll Need
- 02Step 1: Check the Power Source, Not the Amp
- 03Step 2: Inspect the Fuse
- 04Step 3: Test Your Cables and Guitar Connection
- 05Step 4: Check Volume Controls and Channel Routing
- 06Step 5: Test the Speaker and Connections
- 07Step 6: Check the Tubes (Tube Amps Only)
- 08Step 7: Advanced Diagnostics When the Basics Don't Solve It
- 09Fender Amp Troubleshooting Quick-Reference Chart
- 10Frequently Asked Questions
- 11Wrapping Up
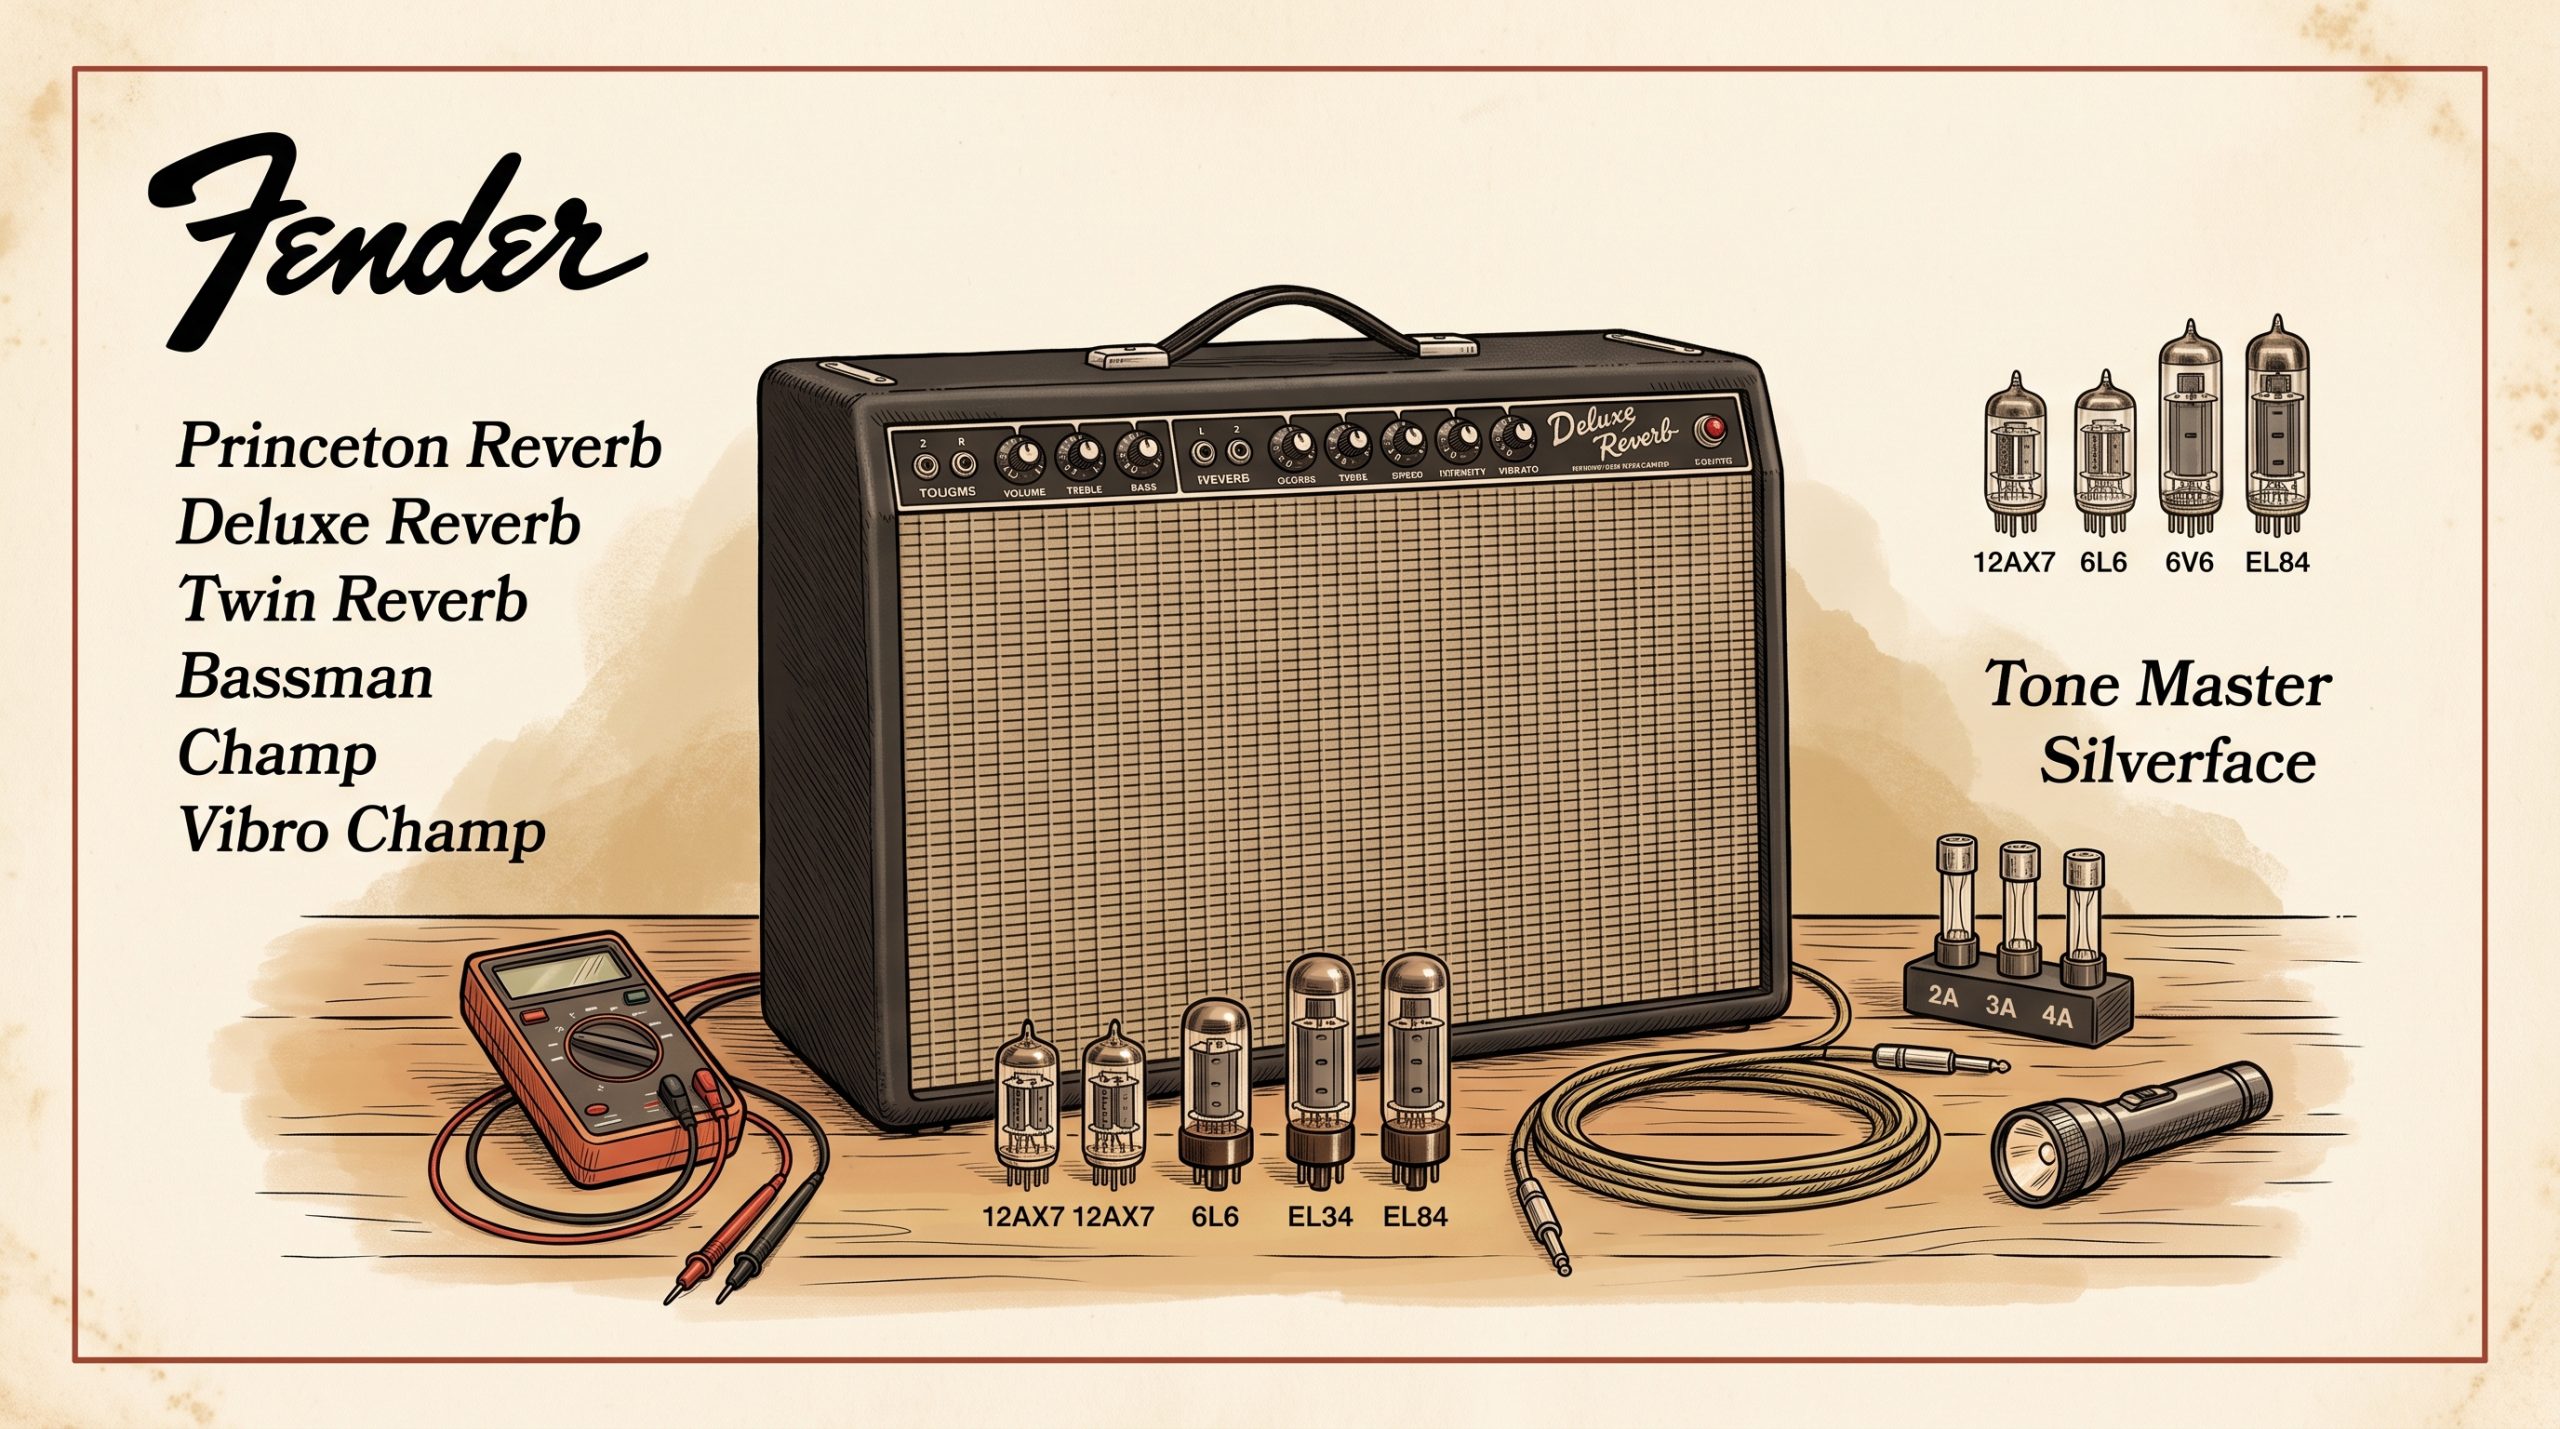
Most dead-amp scenarios come down to five culprits: a blown fuse, a failed tube, a bad cable, a switched-off standby, or a blown speaker. That’s good news. It means most fixes cost under $15 and take under 30 minutes. This walkthrough covers both tube amps (Deluxe Reverb, Twin Reverb, Hot Rod Deluxe, Blues Junior, Super Reverb) and solid-state models (Champion 40, Frontman series) and takes you through each stage in sequence rather than randomly swapping parts until something works.
Before You Start: Safety and What You’ll Need
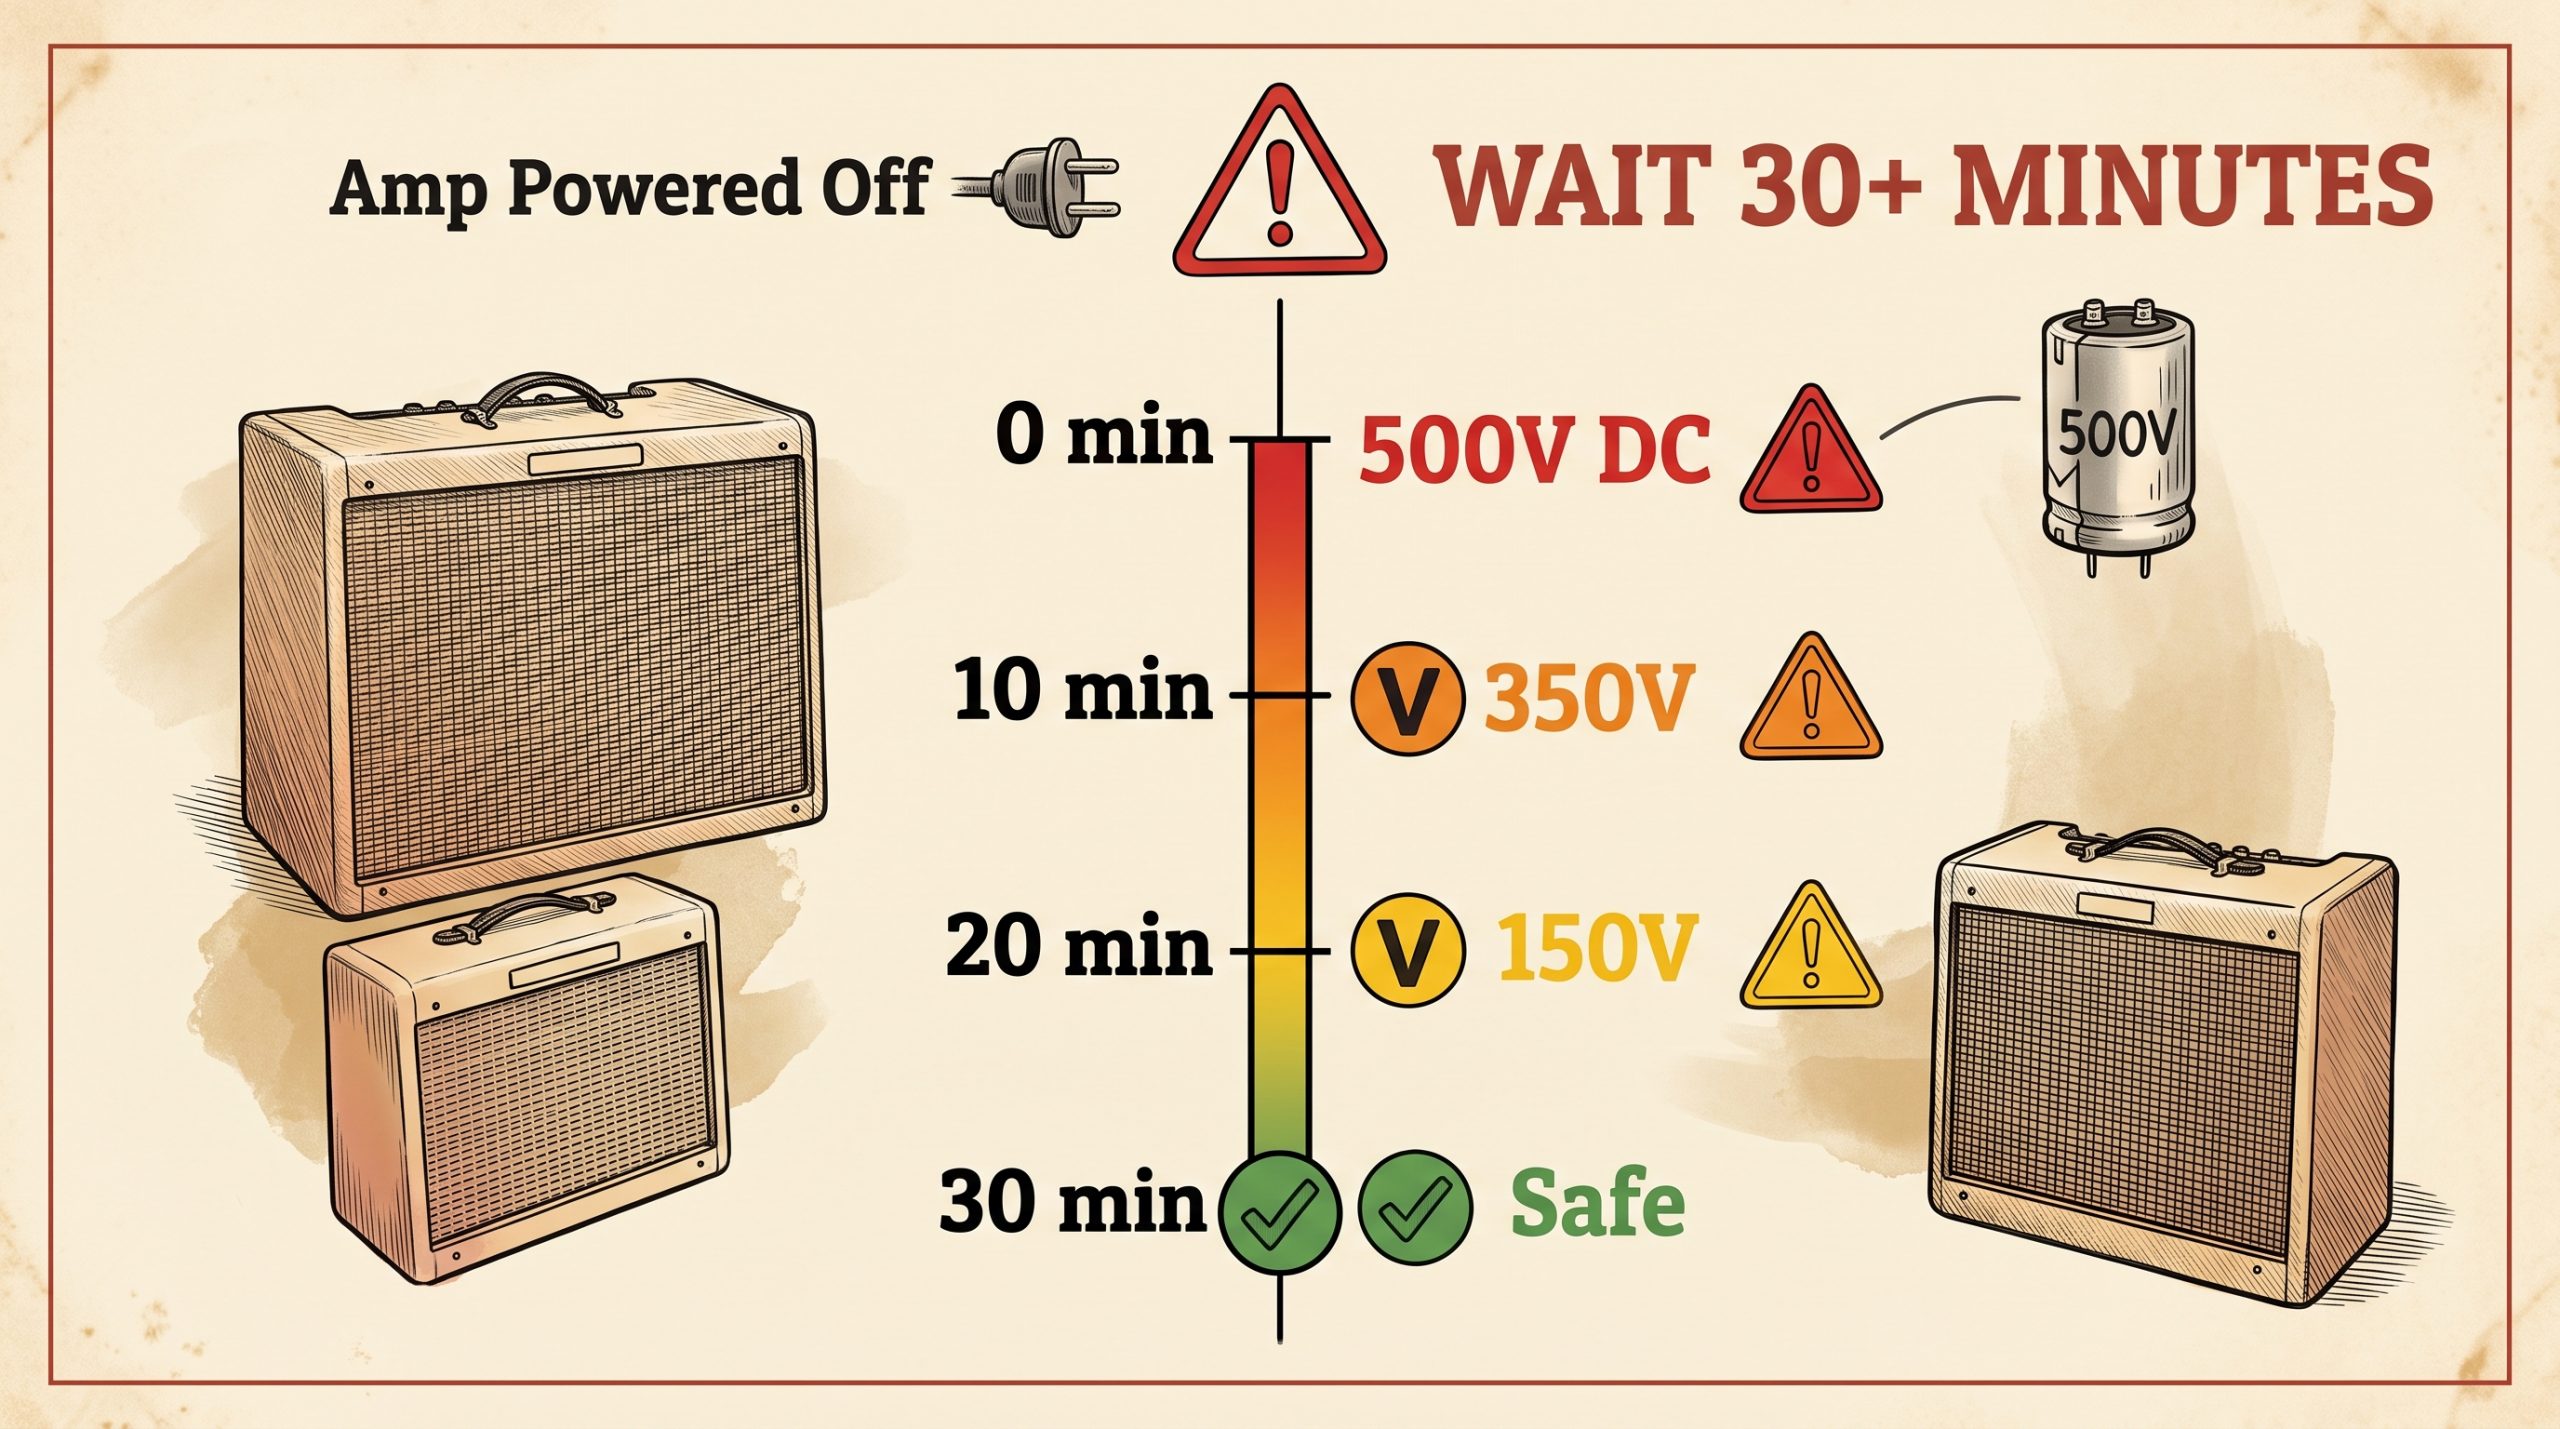
Why Tube Amps Are Dangerous Even When Unplugged
⚡ Tube Amp Only
Filter capacitors inside vintage and reissue Fender tube amps store 400-500V DC after power-off. That voltage can kill. It doesn’t discharge instantly when you unplug the amp. Bleed-down time is a minimum of 30 minutes, and on older amps with dried-out capacitors, it can be longer. Do not probe inside the chassis, touch the circuit board, or handle components unless you know how to safely discharge filter caps with a bleeder resistor. Anything beyond a cable check, fuse check, or tube swap should go to a certified amp technician. Not a suggestion. A hard rule.
Tools You’ll Need
- A known-working guitar cable (not your “usual” cable, which might be intermittently bad)
- A known-working guitar
- A spare fuse matched to your amp’s rating (check the rear panel label)
- A multimeter, set to continuity or DC resistance (around $15 at any hardware store)
- A flashlight
- A non-conductive surface to rest the amp on if you’re removing the chassis
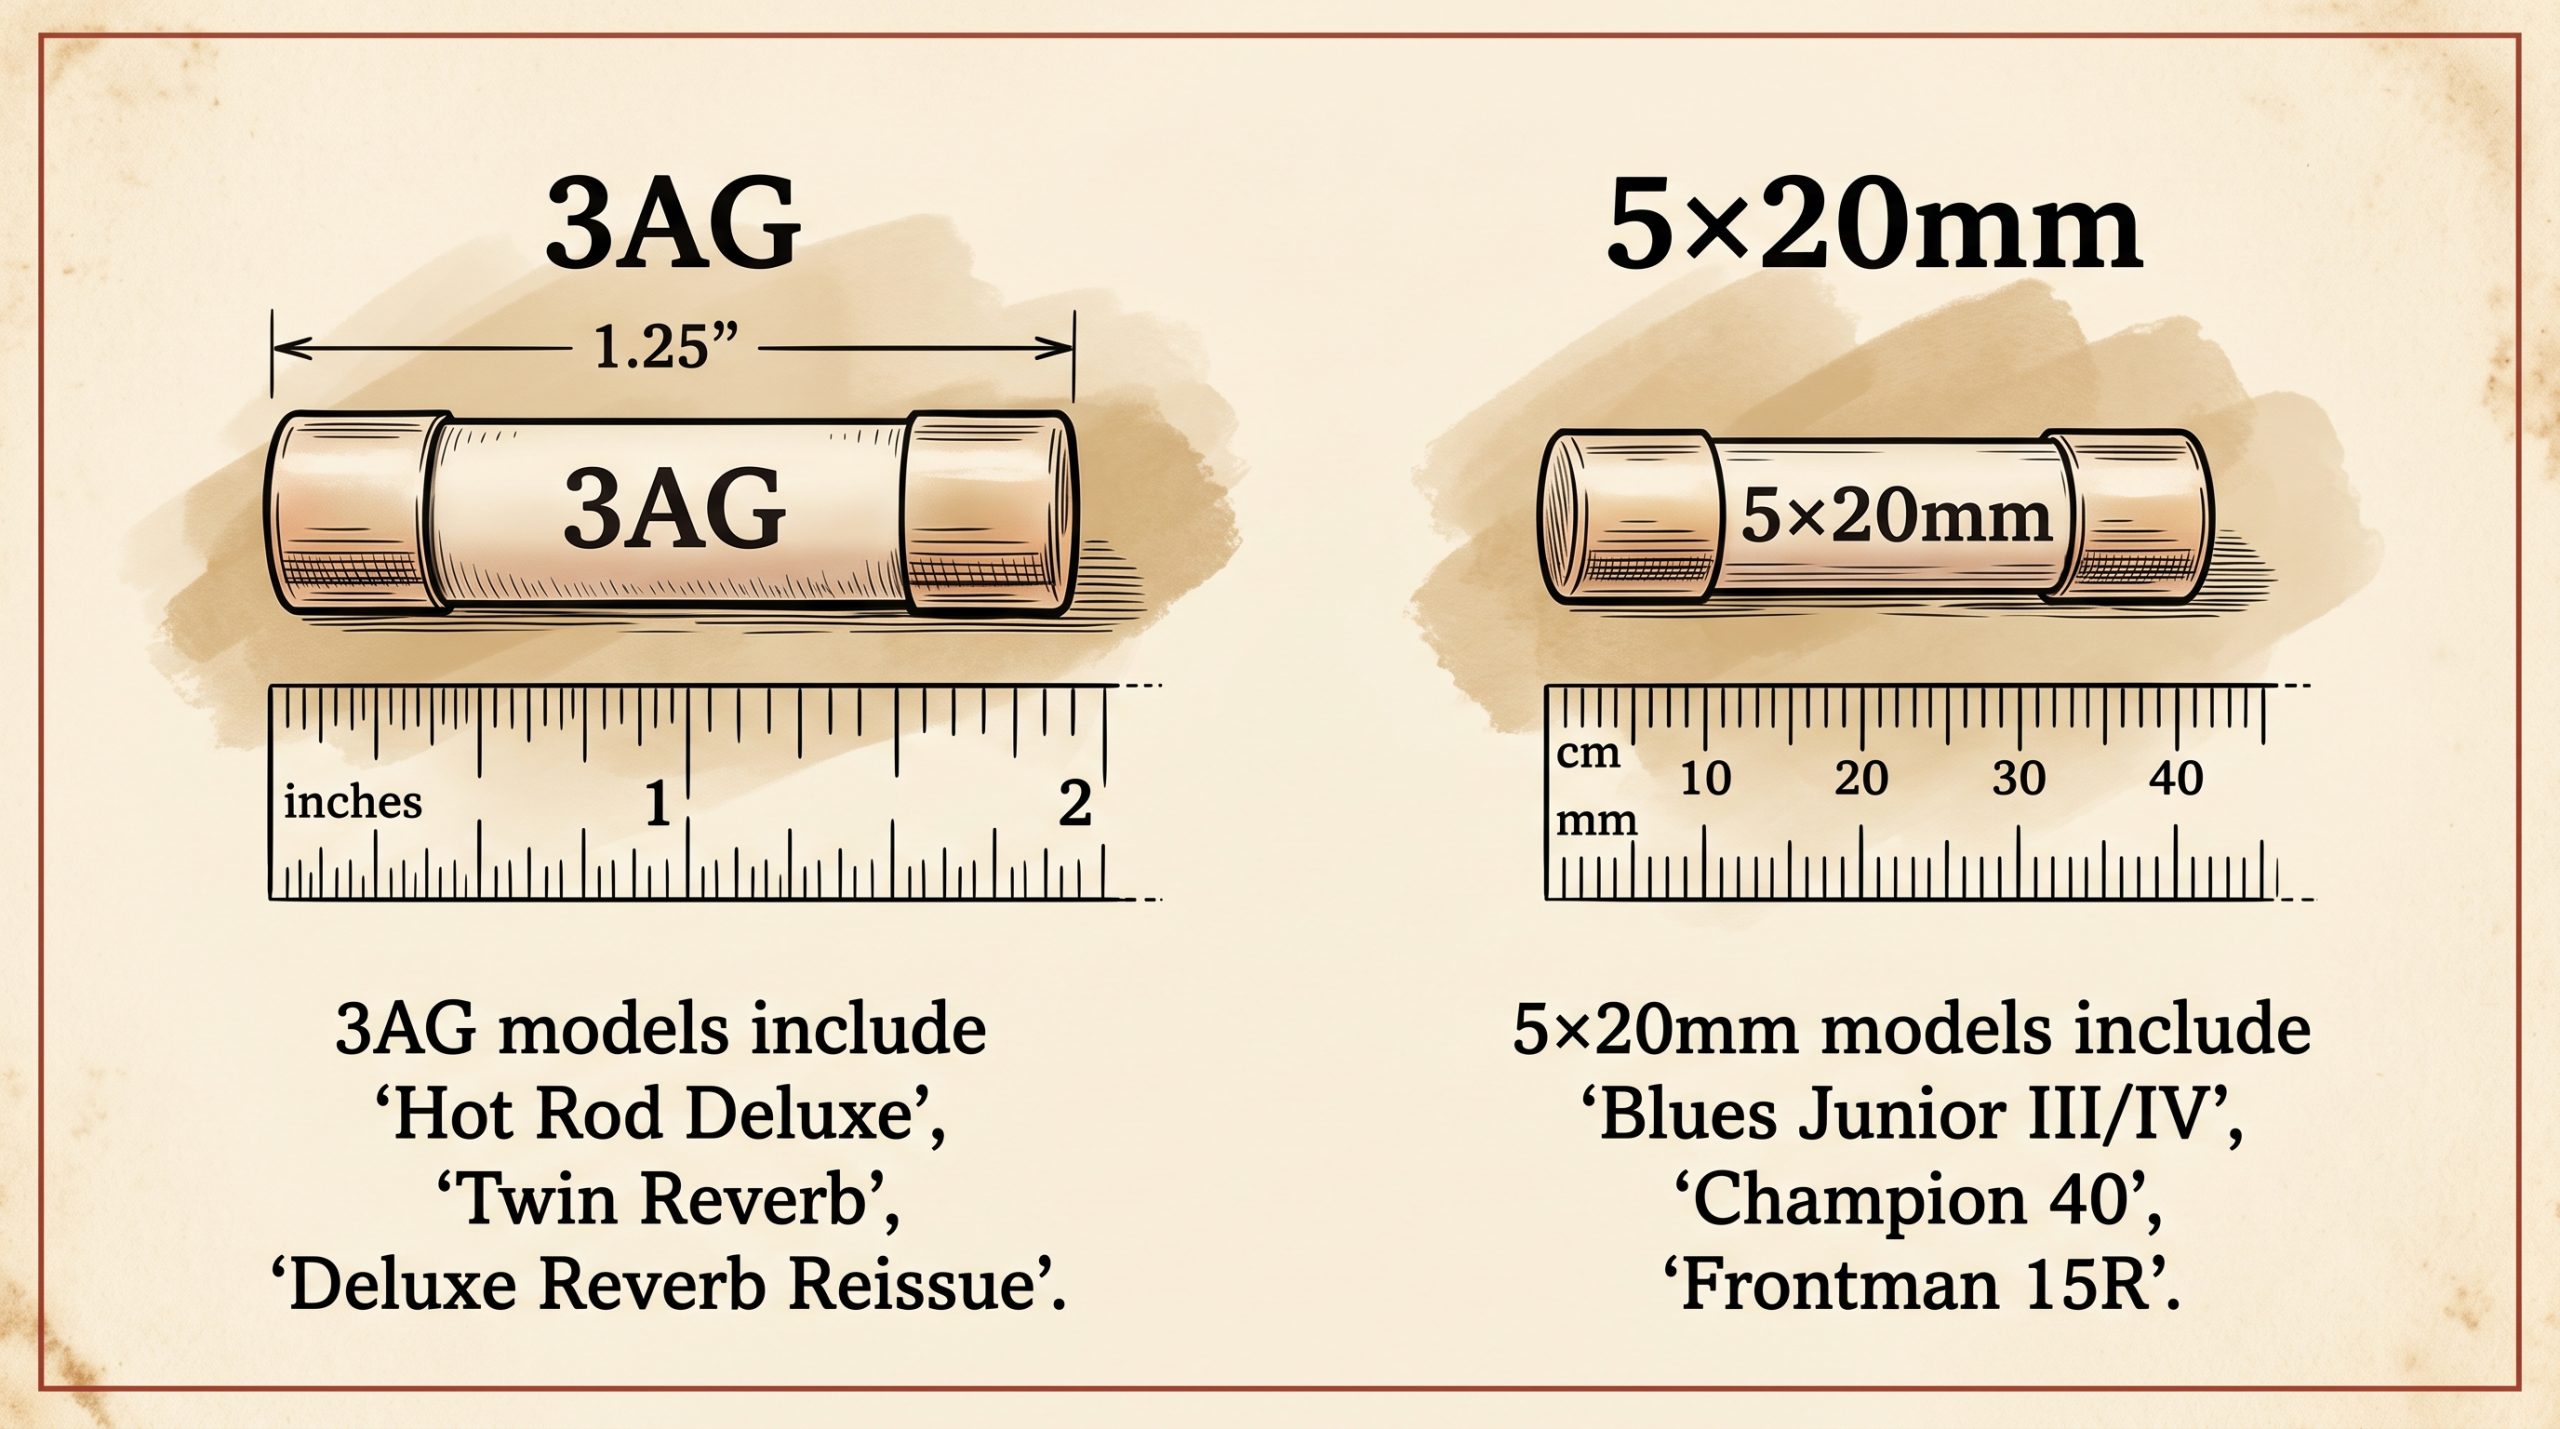
Fender uses two common fuse formats across its lineup. Always replace with the exact type, amperage, voltage rating, and speed (slow-blow vs. fast-blow) as the original. Upsizing a fuse is a fire risk.
| Model | Fuse Type | Amperage | Voltage | Slow-Blow? |
|---|---|---|---|---|
| Blues Junior III/IV | 5×20mm | 2A | 250V | Yes |
| Hot Rod DeVille 212/410 | 3AG | 3A | 250V | Yes |
| Hot Rod Deluxe I/II/III | 3AG | 2A | 250V | Yes |
| Twin Reverb (Silverface) | 3AG | 3A | 250V | Yes |
| Deluxe Reverb (Reissue) | 3AG | 2A | 250V | No (quick-acting) |
| Champion 40 | 5×20mm | 2A | 250V | Yes |
| Frontman 15R | 5×20mm | 500mA | 250V | Yes |
Verify fuse ratings against your specific amp’s rear panel label or owner’s manual before purchasing replacements. Fender’s current support documentation at fender.com/support carries downloadable owner’s manuals for all current production models.
Step 1: Check the Power Source, Not the Amp
Is the Wall Outlet Actually Working?
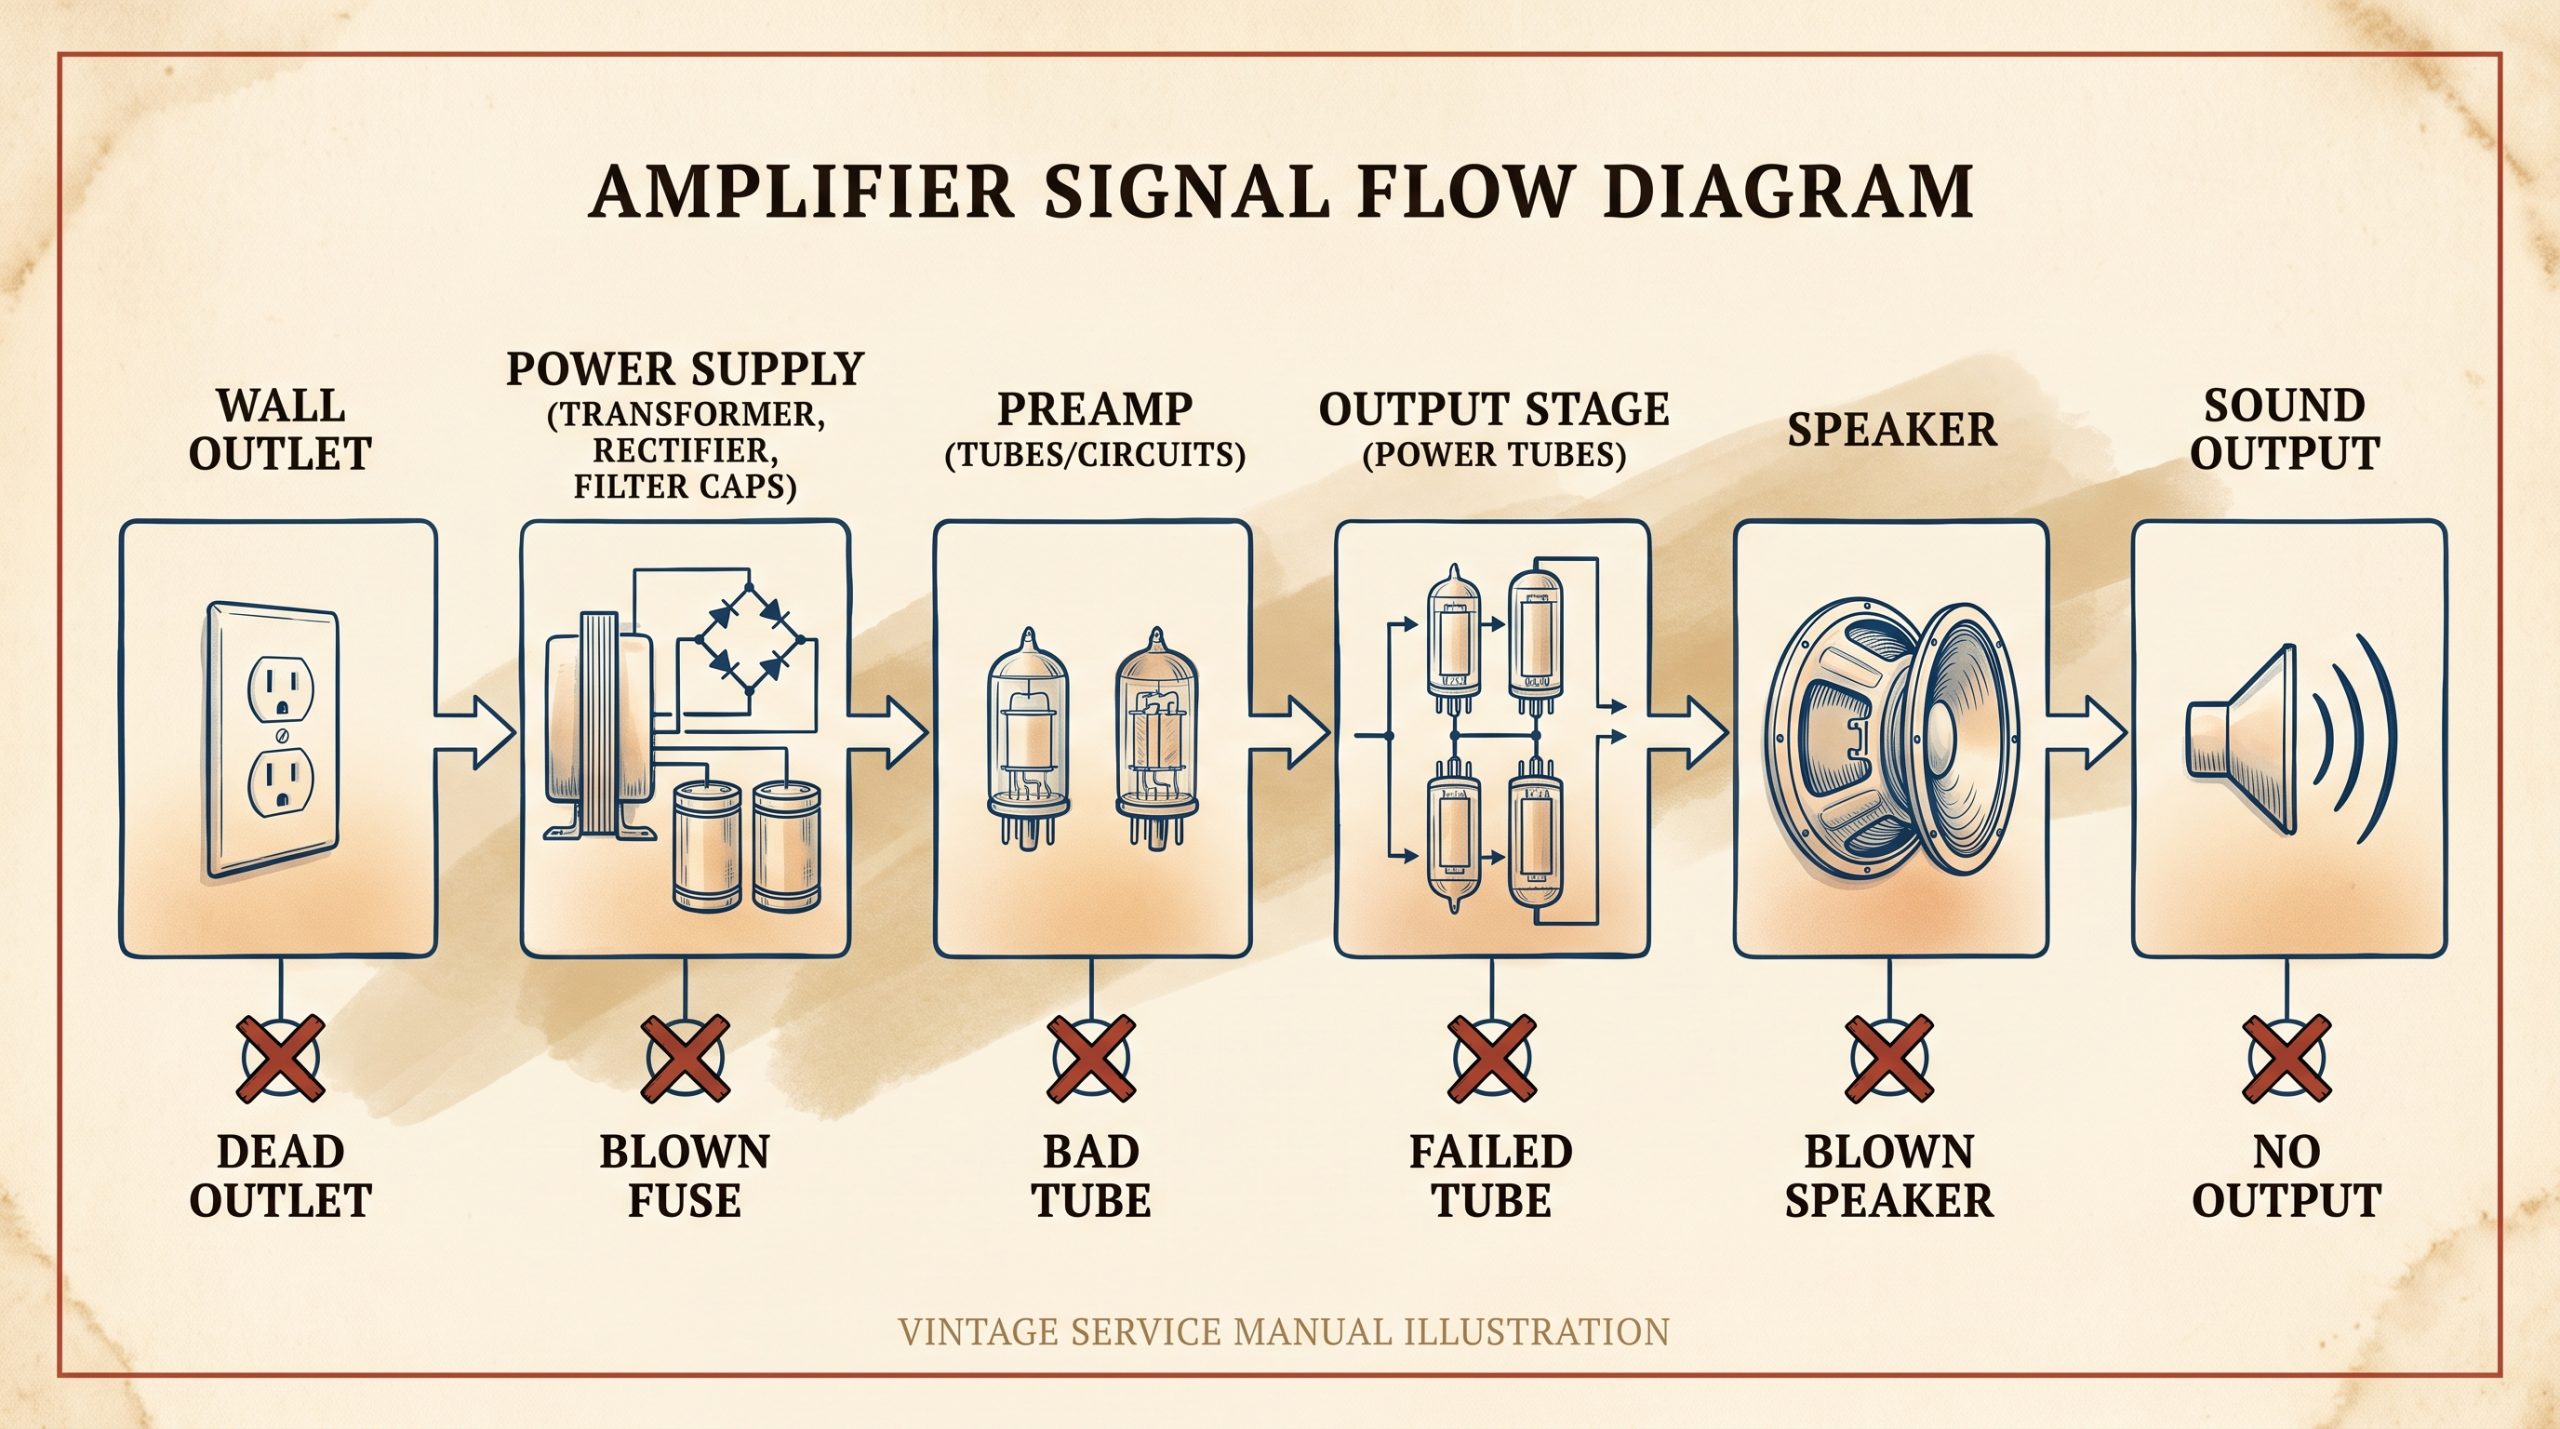
Plug a phone charger or a lamp into the same outlet before assuming the amp is at fault. Some studio and rehearsal room outlets are controlled by a wall switch that’s easy to miss. A tripped circuit breaker will kill an outlet with no visible indication at the outlet itself. Check the breaker panel if the outlet is dead and you can’t find a wall switch.
Is the Power Cable Seated and Intact?
Most Fender tube amps use a detachable IEC power cable, the same type used by computers and printers. Check both ends. Look for fraying, burn marks, or bent prongs. Swap it with a known-working IEC cable if you have one handy. On Frontman and Champion solid-state models, the power cord is often hardwired into the chassis. Inspect the point where it enters the cabinet for tight bends or kinking, which can break the conductors internally without visible external damage.
Is the Amp Actually in Play Mode?
This sounds obvious. It isn’t. Fender tube amps have two switches: Power and Standby. The Power switch must be on, and the Standby switch must be set to the play or off position (depending on how your specific model labels it) before the amp produces sound. A Fender on standby shows a glowing pilot light and warm tubes but outputs nothing. As documented in Fender’s own troubleshooting guide at fender.com/articles, confirming the amp is not in standby mode is one of the first checks before anything else.
Step 2: Inspect the Fuse
Where to Find It
On virtually all Fender tube amps, the fuse holder sits on the rear panel adjacent to the IEC power socket. It’s a twist-cap or pull-drawer style holder, typically accessible with a coin or flathead screwdriver. On Frontman and Champion solid-state models, the fuse is also rear panel, sometimes integrated directly into the IEC socket housing. Unplug the amp completely before touching the fuse holder.
How to Tell If It’s Blown
Visual inspection first. A working fuse has a clear glass tube with an intact wire bridge inside. A blown fuse shows a broken bridge, often with dark discoloration or sooty residue from the arc. If the glass is cloudy or black, it’s blown. For a definitive check, set your multimeter to continuity mode (or Ω/resistance) and touch one probe to each end of the fuse. A working fuse beeps and reads near 0Ω. A blown fuse reads OL (open circuit, infinite resistance). No ambiguity.
Replacing It Correctly
Match the replacement exactly: same physical size (3AG or 5×20mm), same amperage, same voltage, same speed (slow-blow). Drop the new fuse in, replace the cap, plug the amp back in. If the replacement fuse blows immediately, stop. Do not replace it again. A fuse that blows on insertion means there’s a serious internal fault, most likely a shorted output tube, a shorted rectifier, or a failed power transformer. That amp needs a technician, not another fuse.
Step 3: Test Your Cables and Guitar Connection
The Cable Is the Single Most Common Culprit
Instrument cables fail constantly. Internal shield breaks and corroded tip contacts cause intermittent or complete signal loss, and the break often isn’t visible externally. Test with a cable you know is working, not one that “usually works.” Intermittent cables are the most frustrating diagnostic variable in guitar rigs. Remove it from the equation first.
Eliminate Every Link in the Chain
Guitar straight into the amp input. No pedals, no switchers, no tuners. A dead power supply brick on a single pedal in a chain can pull the whole signal down to nothing. If you’re running effects, bypass every pedal and test direct before reintroducing them one at a time. Check the guitar’s output jack and cable tip for green or black tarnish. That’s oxidation, and it kills contact. A quick wipe with a dry cloth often fixes it.
Check the Amp’s Input Jack
Wiggle the cable gently while the amp is on and volume is up. If you hear crackling or the signal cuts in and out, the input jack contacts are oxidized or the contact spring is bent. As noted in Premier Guitar’s vintage Fender troubleshooting resources, swapping the input and return connections on the reverb tank, and cleaning jack contacts with electronic contact cleaner, can resolve intermittent signal issues that look like amp faults but aren’t. Fender blackface and silverface models use Switchcraft-style 1/4″ input jacks with Input 1 (high sensitivity) and Input 2 (low sensitivity). If Input 1 is dead but Input 2 works, the fault is almost certainly that jack alone.
Step 4: Check Volume Controls and Channel Routing
Confirm the Active Channel Volume Is Up
Simple. Easy to miss. On Hot Rod Deluxe and Hot Rod DeVille models, the Normal and Drive channels are switched via a button or footswitch. If you’re plugged in and the Drive channel volume is at zero while the Normal channel volume is up but Drive is active, you’ll hear nothing. On vintage blackface and silverface models with two-channel layouts (most have separate Volume controls for Ch. 1 and Ch. 2), make sure the channel you’re plugged into has its volume turned up.
Check for an Open Effects Loop
Some Fender models, including the Hot Rod Deluxe, have a series effects loop. If a cable is plugged into the Send jack but nothing is connected to the Return, the signal chain is broken at that point. The amp powers on, pilot light glows, tubes glow, and you get nothing. Fix: remove the cable from the Send, or run a patch cable tip-to-tip from Send to Return to bypass the loop. The ’65 Twin Reverb Reissue has no dedicated effects loop at all, so this specific fault doesn’t apply to it; its RCA-style reverb jacks are sometimes pressed into service as an improvised send/return, but there’s no factory Send/Return pair to leave disconnected.
Footswitch Conflicts
A faulty or missing footswitch cable on channel-switching Fender models can put the amp into a muted state or lock it to a channel you’re not expecting. Try unplugging the footswitch entirely and operating the amp controls manually. If sound returns, the footswitch cable or the switch itself is the problem.
Step 5: Test the Speaker and Connections
Signs of a Blown Speaker
With the amp unplugged and powered off, gently press the speaker cone inward with your fingertips near the surround. It should travel smoothly. Grinding or scraping means the voice coil is rubbing the magnet gap, which is a blown speaker. Visually inspect for torn cone surrounds, punctured cones, or any burnt smell around the magnet. Complete silence with everything else working correctly often means an open voice coil. Blown speaker, full stop.
Speaker Impedance Mismatch
Impedance mismatch doesn’t always blow a fuse. On solid-state amps particularly, a mismatched speaker can result in very low output or near-silence. Common Fender output impedance options are 4Ω, 8Ω, and 16Ω. Always match the speaker’s impedance to the amp’s rated output tap.
| Model | Stock Speaker | Impedance | Wattage |
|---|---|---|---|
| Blues Junior IV | Eminence Legend 12″ | 8Ω | 15W |
| Hot Rod Deluxe IV | Celestion A-Type 12″ | 8Ω | 40W |
| Hot Rod DeVille 212 | Celestion A-Type ×2 | 8Ω | 60W |
| ’65 Deluxe Reverb Reissue | Jensen C12K | 8Ω | 22W |
| ’65 Twin Reverb Reissue | Jensen C12K ×2 | 4Ω | 85W |
| Frontman 15R | Fender Special Design 8″ | 8Ω | 15W |
| Champion 40 | Fender Special Design 12″ | 8Ω | 40W |
How to Test a Speaker With a Multimeter
Set the multimeter to DC resistance (Ω). Touch the probes to the speaker terminals. An 8Ω speaker should read approximately 5.5-7Ω DC. The DC resistance of a voice coil is always slightly lower than its nominal impedance rating. A reading of OL (open circuit, infinite) means the voice coil is open. Dead speaker. A reading of 0Ω means the voice coil is shorted. Also a dead speaker. Either way, it needs replacing. If speaker testing and replacement are new territory, the Fender amp powers on but no sound walkthrough covers speaker and preamp fault isolation in more detail.
Step 6: Check the Tubes (Tube Amps Only)
⚡ Tube Amp Only
This is where most online troubleshooting guides fall short. Tubes fail in specific, identifiable ways, and each failure mode points to a different part of the circuit. Random tube swapping wastes money. Systematic tube testing finds the fault.
What Tube Failure Actually Looks Like
- Sudden complete silence: failed output tube or rectifier tube (see below)
- Loud hum with no usable signal: failed preamp tube, especially V1 (the first gain stage)
- Amp works but sounds thin, weak, or lacks punch: output tubes losing emission, bias drifted
- Works on one channel only: failed preamp tube in that channel’s specific gain stage
- Microphonic squeal or ringing: a mechanically loose preamp tube, tap each gently with a pencil eraser while running to identify it
The Visual Check
Power on, standby switched to play, in a darkened room. Look through the ventilation slots at the top of the chassis. Healthy tubes show a warm orange-red glow from the cathode filament. No glow at all from an output tube means it’s cold. Not running. Failed. A bright blue glow inside any tube (not the orange filament, but a blue arc or haze) means the tube is arcing internally. Switch the amp off immediately and do not reinstall that tube. White powder inside the glass envelope means the tube has lost its vacuum. Replace it.
How to Swap Tubes to Isolate the Fault
Start with output tubes. Swap in a known-working matched pair. If the amp comes back to life, the original pair was the problem. No change? Move to preamp tubes, starting with V1 (the input gain stage, always the first tube in the signal chain on Fender amps). Swap V1, test. Then V2, V3 in order. One important note: after replacing output tubes, the amp must be re-biased by a qualified technician. Running output tubes out of spec burns them out faster and can stress the output transformer. On the relationship between different output tube types, the 6V6 vs 6L6 comparison covers how the two tubes differ in operating parameters and what that means for Fender circuits.
| Model | Preamp Tubes | Output Tubes | Rectifier |
|---|---|---|---|
| ’65 Deluxe Reverb Reissue | 4× 12AX7, 2× 12AT7 | 2× 6V6GT | 5AR4/GZ34 |
| ’65 Twin Reverb Reissue | 4× 12AX7, 2× 12AT7 | 4× 6L6GC | Solid-state |
| Hot Rod Deluxe | 3× 12AX7 | 2× 6L6GC | Solid-state |
| Blues Junior | 3× 12AX7 | 2× EL84 | Solid-state |
| Hot Rod DeVille | 3× 12AX7 | 2× 6L6GC | Solid-state |
The Rectifier Tube: A Specific Failure Mode Competitors Miss
This one catches a lot of players off guard. Vintage blackface and silverface Fender amps using a tube rectifier, primarily the 5AR4/GZ34, can fail in a way that produces exactly this symptom: the power switch is on, the pilot light glows, preamp tubes warm up, and the amp produces absolutely no sound. No hum, no signal, nothing. The reason is that a failed rectifier produces no B+ (high-voltage DC) for the output stage to operate on. The amp powers on electrically but the output stage is starved. Rectifier tubes are inexpensive ($15-25) and require no re-biasing after replacement. Swap it first if you’re working on a vintage Deluxe Reverb, Twin Reverb, Super Reverb, or any other Fender model with a tube rectifier socket, and your amp shows pilot light on, tubes glowing, zero output.
Step 7: Advanced Diagnostics When the Basics Don’t Solve It
Power On, Light On, No Sound: Signal Chain Tracing
You’ve confirmed the outlet works, the fuse is good, the cable is good, the input jack is good, the tubes are all glowing, and the volume is up. Still nothing. The signal is breaking somewhere between the preamp output and the speaker. If your amp has a headphone output, plug headphones in. Sound in the headphones with nothing from the speaker confirms the fault is in the speaker or speaker cable, not the amp circuit. No sound in headphones either means the fault is in the preamp or phase inverter stage, requiring voltage measurements at circuit nodes. That’s technician territory. The capacitor charge hazard described at the start of this guide applies fully here.
Distorted Sound Rather Than Silence
Not all failures produce complete silence. A bad or microphonic preamp tube produces excessive hum, squealing, or distorted output on the clean channel. Output tubes that are approaching end of life produce spongy compression, weak output, and a mushy bottom end rather than the stiff bass response of fresh tubes. Bias that has drifted too far in either direction produces crossover distortion (a gritty, harsh quality on clean settings) or excess heat and tube wear. On models with a reverb tank: a loose or disconnected reverb input/output cable causes a thump when you tap the chassis but no reverb effect. Not silence. Reconnecting the RCA plugs on the reverb tank pan is a two-minute fix.
When to Stop and Call a Technician
Some symptoms belong with a tech. No exceptions.
- The replacement fuse blows immediately on power-up
- A bright blue arc is visible inside any tube while powered on
- Any burning smell coming from the chassis (especially a sweet, acrid smell from a failing capacitor)
- The amp is a vintage model from the 1960s-1980s with original filter capacitors, regardless of current symptom, a re-cap is likely due and prevents catastrophic failure
- Any fault requiring voltage measurements at internal circuit nodes
When you bring the amp in, describe the symptoms precisely: what it does, what it doesn’t do, when the fault first appeared, and any recent changes (new tubes, a drop, water exposure). That information cuts diagnostic time significantly. Estimated repair costs from a competent amp tech: tube swap plus bias set runs $60-120; filter cap recap runs $150-300 depending on amp size; output transformer replacement runs $200-500 or more on vintage models.
Fender Amp Troubleshooting Quick-Reference Chart
| Symptom | Most Likely Cause | DIY Fix? | Estimated Cost |
|---|---|---|---|
| No power, no pilot light | Blown fuse, bad outlet, failed power switch | Yes | $1-$5 |
| Pilot light on, no sound (tube amp) | Failed output tube or rectifier tube | Yes (tube swap) | $15-$60 |
| Pilot light on, no sound (solid-state) | Blown speaker, bad cable, failed power amp IC | Partial | $0-$80 |
| Loud hum, no signal | Failed V1 preamp tube | Yes | $10-$20 |
| Sound cuts in and out | Bad input jack, bad cable, cold solder joint | Partial | $0-$10 |
| Clean channel sounds distorted | Bad preamp tube, bias drifted out of spec | Partial | $10-$30 |
| Fuse blows immediately on power-up | Shorted output tube, failed transformer | No. See a tech. | $50-$300+ |
| Works but very quiet | Weak output tubes, bias drift | Partial (tube swap yes, bias no) | $60-$100 with tech for bias |
Wrapping Up
The majority of Fender amp failures follow a short list of causes, and most of them are diagnosable without opening the chassis. Work through the steps in order: power source, fuse, cables, controls, speaker, then tubes. Each step eliminates a category of fault before you move to the next. On vintage tube models, don’t overlook the rectifier tube as an isolated failure mode. It’s easy to swap, requires no re-biasing, and is frequently the cause of a “light on, dead silent” fault that looks like something far more serious. For anything involving internal voltages, an output transformer, or filter capacitors on a vintage amp, find a technician with Fender-specific experience. Local music store referrals and vintage amp forums are the most reliable way to find one, and it’s worth asking specifically about experience with the era your amp was built in, since silverface troubleshooting and blackface troubleshooting do differ at the component level.
Frequently asked questions
Why is my amp on but not playing anything?
A powered-on Fender amp with no output almost always means the signal chain is broken somewhere between the input jack and the speaker. The most common causes are a bad instrument cable, a standby switch left in the standby position, an effects loop Send jack with nothing plugged into the Return, a failed output tube on tube amps, or a blown speaker. Follow Steps 3 through 5 of this walkthrough in order before opening the chassis. Most of these faults are identifiable without tools in under ten minutes.
Why did my amp suddenly stop working?
Sudden failure (amp worked at the last rehearsal, now completely dead) points most often to a blown fuse, a failed output tube, or a failed rectifier tube on tube amps. The fuse is the first check because it's the fastest. If the fuse is intact and pilot light glows but there's no sound, move directly to tube inspection. On solid-state models, sudden failure more often indicates a blown fuse, a failed power amp IC, or an internal solder joint failure triggered by vibration, heat cycling, or physical impact.
How do I tell if my amp speaker is blown?
Press the cone gently with your fingertips near the surround while the amp is unplugged. Smooth travel means the speaker is mechanically intact. Grinding or scraping means the voice coil is rubbing the magnet gap. That's a blown speaker. For an electrical test, set a multimeter to DC resistance and probe the speaker terminals: an 8Ω speaker should read approximately 5.5-7Ω DC. An OL reading (infinite resistance) means the voice coil is open. A 0Ω reading means it's shorted. Both results mean a blown speaker that needs replacement.
How do I get a Fender amp to work after it's been in storage?
Long-stored amps, especially vintage tube models, should be brought back online carefully. Check the fuse first. If it's intact, power on in standby for 15-20 minutes at low volume to let the tubes warm up and the filter capacitors reform before applying full signal. Old electrolytic filter capacitors can fail violently when full voltage is applied after years without power. This is a documented risk on any vintage Fender with original capacitors from the 1960s through 1980s. If the amp has sat in a garage or storage unit for more than a few years, a capacitor check before full power-on is worth the cost of a tech visit.
Can I fix my Fender amp myself, or do I need a technician?
Cable testing, fuse replacement, tube swapping (with the amp powered off and unplugged), and effects loop bypass are all safe DIY steps for any player regardless of electronics experience. Anything that requires probing a live chassis, re-biasing output tubes, tracing signal faults at circuit nodes, or handling filter capacitors requires high-voltage safety training. Voltages inside a tube amp can reach 500V DC and remain dangerous for 30 minutes or more after unplugging. That's not an exaggeration, and it's not a liability disclaimer. It's physics.